LED Blink
This program is the Hello World of sorts for an Arduino. We light up an LED and make it blink. Collect an LED and a resistor from your lab instructor. A 1k resistor should do just fine.

TIP
The longer wire on your LED is the positive terminal, aka Anode. Always connect the Anode to the +ve voltage.
WARNING
Make sure that a resistor is in series with the LED or the LED will let out the magic smoke and die.
Connect the Anode of the LED to Digital Pin 13 of the Arduino and connect the other pin to Ground via the resistor. Like shown below. Use a breadboard.
| Diagram | Schematic |
|---|---|
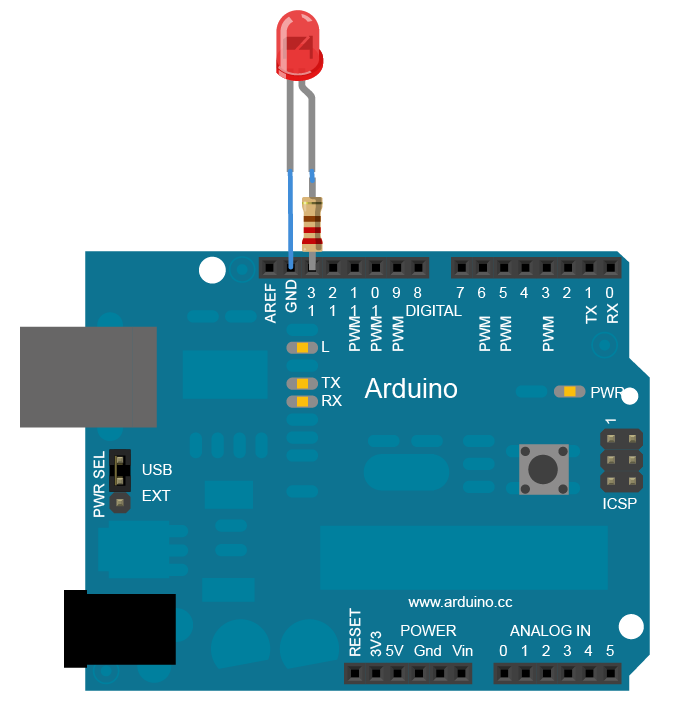 | 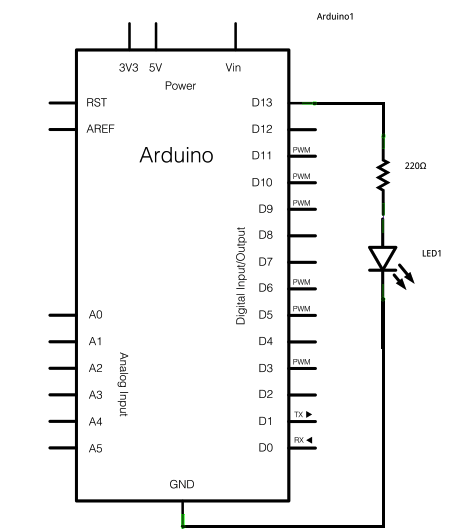 |
Let's light up the LED now. Connect the Arduino to your computer and open the Arduino IDE. Arduino doesnt need an external power source when connected via the USB wire.
Sketch
Programs in Arduino IDE are called Sketches. Open a new Sketch. It should look something like this.
void setup() {

}

void loop() {

}
All the code in setup() {} is run once. Things like setting pin-mode are put here.
loop() {} contains the code that is done repeatedly.
First, initialise the pin 13 as OUTPUT. Then set it as HIGH using the digitalWrite() function.
void setup() {
  pinMode(13, OUTPUT);     // Set pin 13 as Output
}

void loop() {
  digitalWrite(13, HIGH);  // Make the pin high.
}
Upload the code to the Arduino using the → button in your IDE (Top left corner). The LED should light up on uploading and stay lit.
Now try the code below and try to reason by yourself what's happening.
void setup() {
  pinMode(13, OUTPUT);                // Set pin 13 as Output
}

void loop() {
  digitalWrite(13, HIGH);             // Make the pin high.
  delay(1000);                        // wait for a second (1000 milli second)
  digitalWrite(13, LOW);              // Now make it sober.
  delay(1000);
}
Try different arguments for the delay function.